
Japanese Woodblock Printing: Essential Techniques
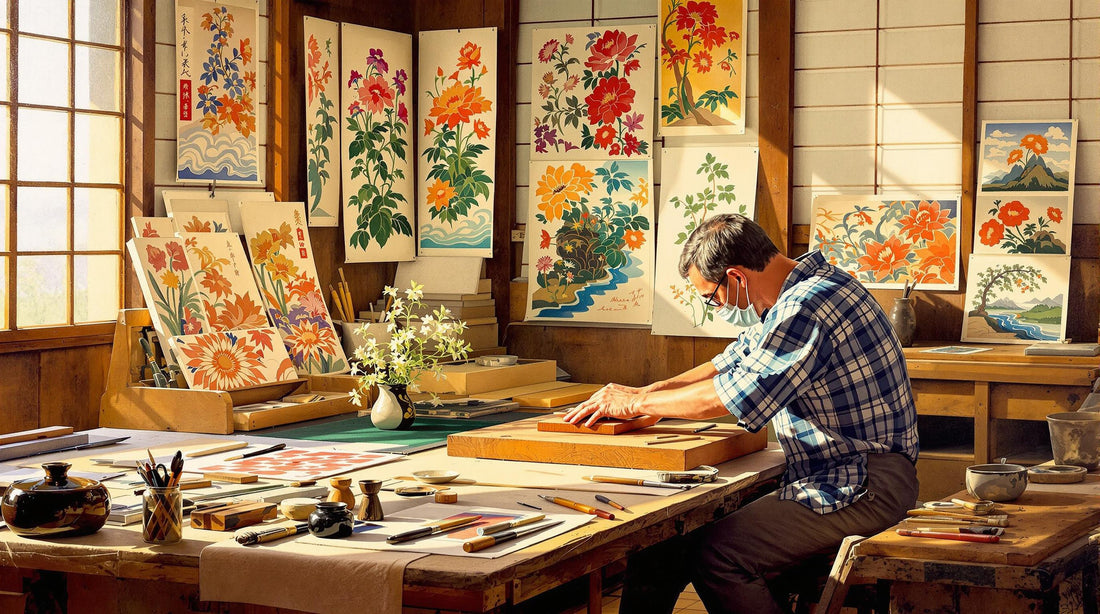
Japanese woodblock printing, or Mokuhanga, combines artistry and precision to create stunning prints using water-based inks, carved wooden blocks, and washi paper. Whether you're drawn to its eco-friendly materials, connection to Japanese heritage, or versatility for modern and classic designs, Mokuhanga offers a rewarding creative outlet.
Key Takeaways:
- Tools & Materials: Use dense woods like cherry, specialized carving tools, water-based pigments, and washi paper for best results.
- Carving Techniques: Sand the block, transfer your design, and carve with precision, focusing on kento marks for alignment.
- Printing Process: Apply pigments with brushes, use a baren for even pressure, and layer colors carefully for multi-block prints.
- Care & Storage: Store prints flat in a cool, dry place using acid-free materials to maintain their quality.
Mokuhanga requires patience and practice but offers endless possibilities for creating timeless art. Start with simple designs and gradually refine your skills to master this traditional craft.
Mokuhanga Fundamentals Online Workshop

Tools and Materials
Choosing the right tools and materials is key to creating detailed and vibrant Japanese woodblock prints. Every piece of equipment contributes to the final result, ensuring precision and quality in Mokuhanga.
Wood Types and Selection
For traditional Japanese woodblock printing, side-grain woods like cherry or certain types of specialized plywood are commonly used. These woods are dense and have smooth grains, which helps in achieving sharp details, even ink coverage, and durability for repeated use.
Carving Tools Guide
Japanese carving tools are meticulously crafted, often by skilled artisans. Each tool has a specific function: V-Gouges and U-Gouges handle fine details and larger clearings, while knives are used for initial outlines, and clearing chisels help remove background areas [4].
Essential Printing Materials
To achieve the best results, several specialized tools and materials are required for the printing process:
- Baren: A tool made from bamboo and paper layers, used to apply even pressure during printing [1].
- Hanga Bake: Specialized brushes for applying ink evenly [1].
- Water-based pigments: These provide smooth application and rich, vibrant colors.
- Washi paper: Known for its soft texture, durability, and resistance to warping, washi paper is a favorite choice for Mokuhanga [2].
Traditional and modern options for these materials are available at many art supply stores, making it easier for beginners to get started. Once equipped, the next step is preparing and carving your woodblock design.
How to Carve Your Block
Carving is a key step in Japanese woodblock printing, requiring patience, precision, and the right techniques. It forms the basis for the colorful prints that Mokuhanga is known for.
Preparing the Woodblock
Start by thoroughly cleaning the wood surface. Sand it with fine-grit sandpaper to make it smooth and remove any debris. A thin layer of nori paste can be applied to create a better surface for transferring your design and to minimize splintering during carving [1].
Transferring Your Design
Traditional methods of design transfer allow for accurate reproduction of details and ensure the image is properly oriented for printing [3]. To transfer your design, follow these steps:
- Create a mirror image of your design on thin paper.
- Apply rice paste to the woodblock.
- Place the design face-down on the block.
- Smooth the paper to ensure it adheres fully to the surface.
Carving Techniques
Begin by outlining your design using fine V-gouges. Once the outline is complete, switch to U-gouges and chisels for clearing larger areas. Use finer tools for intricate details, paying close attention to the kento marks, which are essential for aligning multi-color prints [3].
Key tips for carving:
- Maintain a depth of 2-3mm to hold ink effectively.
- Hold tools at a 45-degree angle to avoid splitting the wood.
- Always carve along the wood grain to prevent tear-out.
- Work slowly, applying consistent pressure.
- Carve away from your body and keep your free hand behind the cutting edge for safety.
- Double-check kento marks to ensure proper alignment [3].
If you're new to this, start with simple designs and work your way up to more detailed patterns [2]. Once your block is carved, you'll be ready to explore pigment application and the printing process.
Printing Your Design
With your block carved, it's time to prepare pigments and dive into the printing process.
Mixing and Applying Pigments
In traditional Mokuhanga, brushes give you better control over colors. Mix pigments with nori paste and water until you get the right consistency and color intensity [1]. Before you start, test the mixture on scrap wood to ensure the opacity is just right.
Use a hanga bake brush to apply the pigment. Hold the brush vertically and move it in gentle circular motions to evenly work the color into the carved areas [1]. This method helps create smooth color transitions and avoids pigment pooling in deeper sections.
Steps for Baren Printing
Follow these steps for sharp, clean prints:
- Lay dampened washi paper over the inked block.
- Use a baren to rub in a zigzag motion with firm, even pressure.
- Make sure the paper fully contacts the inked areas for a clear impression.
"The printing process involves placing damp paper on the inked block and rubbing it rigorously with a baren to force the paper into hard contact with the inked lines of the wood block" [3].
Printing with Multiple Colors
For multi-colored prints, precision and patience are key. Each color requires its own carved block [3]. Kento marks, added during block preparation, help you align the layers perfectly.
When layering colors:
- Begin with the lightest color.
- Let each layer dry completely before moving to the next.
- Keep your work area clean and check the kento alignment regularly.
- Apply consistent pressure across all blocks.
Spread pigments evenly and avoid overloading the block to maintain smooth color transitions. Once finished, proper care and finishing will preserve the print's quality and vibrancy.
sbb-itb-1119188
Print Care and Finishing
Color Gradation Methods
Creating smooth color transitions, also known as bokashi, demands careful control over how pigments are applied. Using hanga bake brushes in circular motions is key to achieving the desired effect [1].
Here are some tips for achieving professional-looking gradients:
- Begin with a small amount of pigment and build up gradually.
- Apply consistent, gentle pressure with your brush.
- Test your gradients on scrap wood before working on the final blocks.
- Clean your brushes thoroughly between color applications to avoid contamination.
After completing your prints, proper care and storage are critical for maintaining their appearance and longevity.
Print Storage Guide
Storing Mokuhanga prints correctly helps preserve their intricate details and vibrant colors. While washi paper is known for its durability, careful handling is still essential [2].
Follow these storage tips to keep your prints in excellent condition:
| Storage Factor | Recommended Approach | Why It Matters |
|---|---|---|
| Environment | Store in a cool, dry place away from sunlight | Prevents fading and damage to the paper fibers. |
| Position | Lay flat or roll with the print side inward | Avoids creasing and physical wear. |
| Materials | Use acid-free boxes and storage materials | Protects against chemical damage over time. |
| Handling | Handle with clean, dry hands and limit contact | Prevents oils and moisture from affecting the print. |
When drying fresh prints, lay them flat in a clean, shaded area. Keep the humidity consistent to avoid warping or curling. Proper storage ensures your artwork stays vibrant and intact for years.
Learning Resources
Classes and Video Lessons
Getting started with Mokuhanga has never been more accessible, thanks to both in-person workshops and online courses. The Adachi Institute of Woodcut Prints, for instance, offers hands-on workshops that guide you through every step - from selecting the right wood to mastering the printing process.
Here are a few platforms where you can find structured learning options:
| Platform | Focus |
|---|---|
| Skillshare | Self-paced video lessons with project-based tasks |
| Craftsy | Online courses with a structured approach |
| Japanese Art Society | Live virtual workshops for interactive learning |
Reading Materials
Books remain a go-to resource for learning Mokuhanga techniques, whether you're a beginner or looking to refine your skills. Some must-reads include Hiroshi Murase's "The Art of Japanese Woodblock Printing", April Vollmer's "Mokuhanga", and Rebecca Salter's "Japanese Woodblock Printing". These guides delve into everything from tools and techniques to the art's rich history.
Topics you can explore in these books include:
- Illustrations of carving tools and their uses
- Step-by-step carving and printing instructions
- Tips for mixing and layering colors
- Patterns and designs rooted in tradition
Raw Japan Art on BrandonChin.net

For a modern twist, Raw Japan Art on BrandonChin.net blends contemporary ideas with classic Mokuhanga techniques. This platform not only highlights traditional Japanese craftsmanship but also introduces fresh approaches that keep the art form evolving.
To stay updated, follow Mokuhanga artists and organizations on social media. These resources will help you refine your skills and bring the timeless beauty of Mokuhanga into your work.
Summary
Main Points Review
To excel in Mokuhanga, it's crucial to get comfortable with the tools - like chisels, the baren, and brushes - and use high-quality materials, including wood blocks, washi paper, and pigments. Start with basic designs and gradually work your way up to more intricate patterns as your skills grow.
With these basics covered, you're ready to begin your Mokuhanga journey.
Next Steps
- Get the Right Tools: Invest in reliable tools such as chisels and a baren. For materials, start with beginner-friendly options like shina plywood and student-grade washi paper.
- Build Your Skills: Start with simple, single-color prints. Focus on basic carving techniques before moving on to multi-block prints. Practice using the zigzag baren technique daily to improve muscle memory and control.
Traditional apprentices dedicate years to perfecting their craft. To make steady progress, set aside 2-3 hours each week for focused practice, tackling one technique at a time.
For continued growth, consider joining groups like the Japanese Print Association. These communities offer feedback, encouragement, and inspiration as you advance in this rewarding art form.
FAQs
What is the purpose of a baren in printmaking?
A baren is a handheld tool with a flat surface, traditionally wrapped in bamboo, used to apply consistent pressure during printing [1]. Its design lets artists control the pressure, allowing them to create effects ranging from bold, solid areas to soft, subtle gradients [4]. This tool is key to producing the clear, high-quality prints associated with Mokuhanga.
What is the ink made of for Japanese woodblock prints?
The ink for traditional Japanese woodblock prints combines sumi (made from soot and glue) and water-based pigments mixed with nori paste [4]. This blend creates vibrant colors and smooth gradients while avoiding harmful chemicals [1][2]. The water-based inks produce softer, more delicate effects compared to Western printing techniques, adding to Mokuhanga's unique style [2].
These tools and materials are essential for creating the intricate and colorful prints that define Mokuhanga. A solid understanding of these basics helps beginners tackle common challenges as they refine their printmaking skills.